DIY RV Solar Install: Step-by-Step Guide & Tips
Introduction
Believe it or not, you can save a few of thousands of dollars by installing solar for your RV yourself. If you enjoy a good DIY project, this is a great way to save money and become more independent on the road. Whether you're a budget-conscious traveler or you simply don't have trustworthy professionals in your area, a solar system can make all the difference when it comes down to traveling.
With some guidance, you should be able to power an RV wherever you go. This guide is going to walk you through how to do that—let's dive in!
Mounting Solar Panels on Your RV
Choose Mounting for Rigid Panels
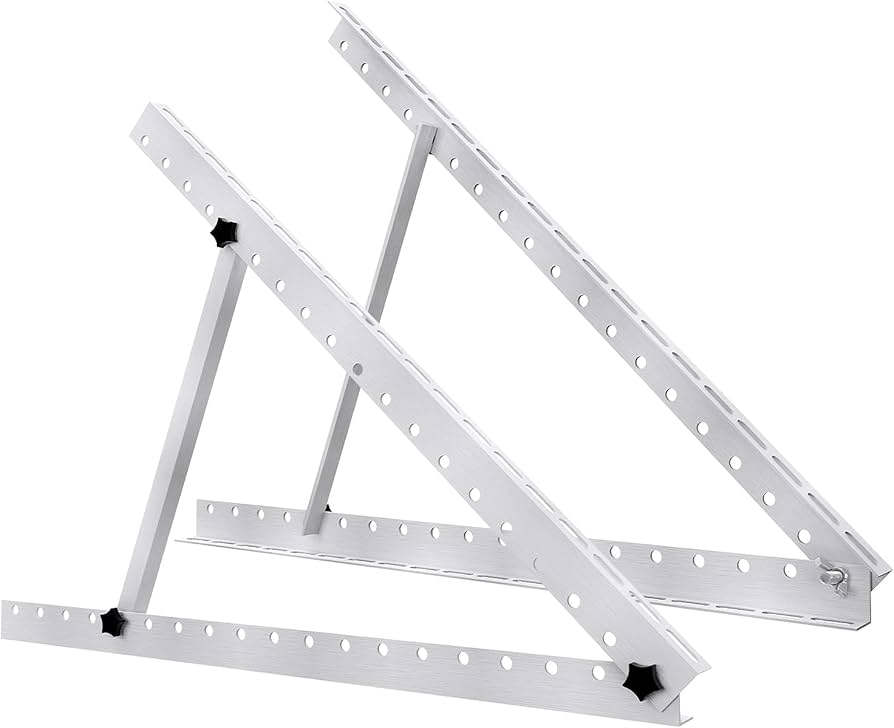
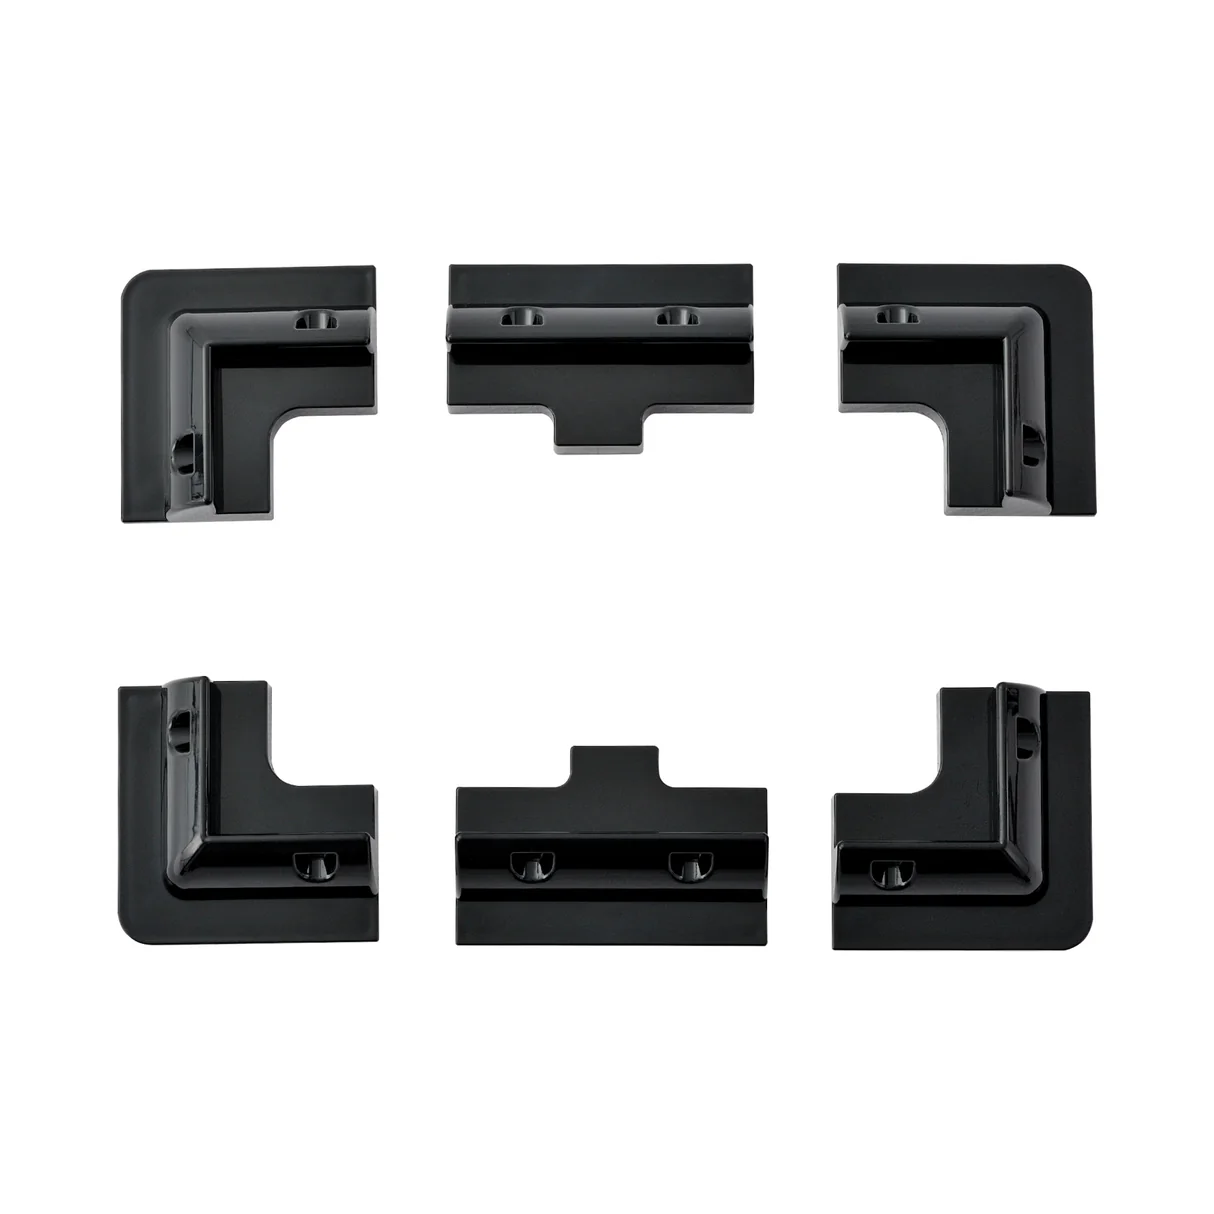
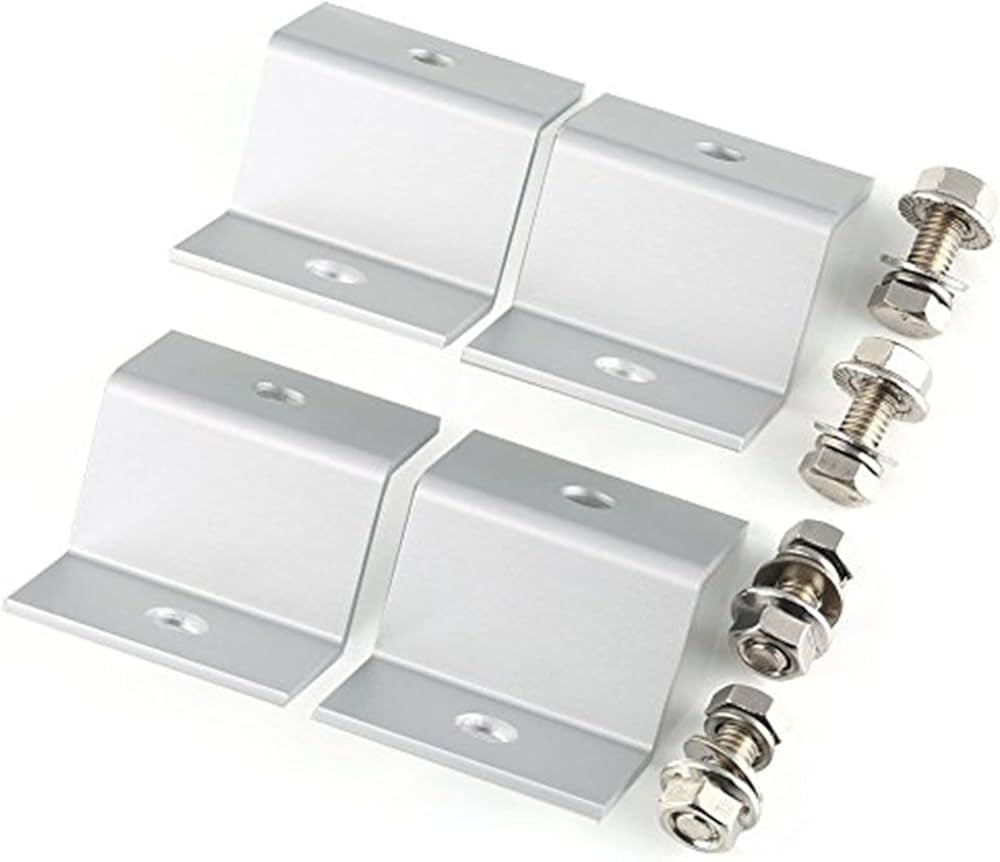
The three main types are Z brackets, tiltable mounting brackets, and corner brackets. Each has its own advantages and disadvantages.


| Mounting Type | Cost | Drilling Required | Angle Adjustment |
|---|---|---|---|
| Z Brackets | $10 per set | Yes | No |
| Corner Brackets | $20–30 per set | No | No |
| Tiltable Mounting Brackets | $30–50 per set | Yes | Yes |
Keep in mind that tiltable mounting brackets will require you to manually set the angle each time you move.
How to Mount Flexible Panels
Mounting flexible panels may seem like a straightforward task—you just slap them onto the roof, right? Well, not so fast. The biggest challenge with flexible panels is overheating. If you mount them flush against the surface of your roof, they can trap heat, which not only reduces their efficiency but can also be dangerous, potentially leading to fires. The key is leaving an air gap between the panels and the roof to allow for airflow.
To create this air gap, you can use spacers or raised mounting points. Yes, this might add a bit to the cost, as proper spacers or risers can set you back $10–$20 extra, but trust me, it’s worth it. This gap will help the panels stay cool and operate efficiently without putting your RV at risk.
Tools and Materials Needed
Before you start drilling holes and mounting panels, make sure you’ve got the right tools and materials. Here’s what you’ll need:
- Mounting brackets
- Drill with appropriate bits (if you decide to drill holes)
- Screws and bolts (often included with mounting kits)
- Adhesive sealant (for waterproofing any holes)
- Wire cutters and strippers
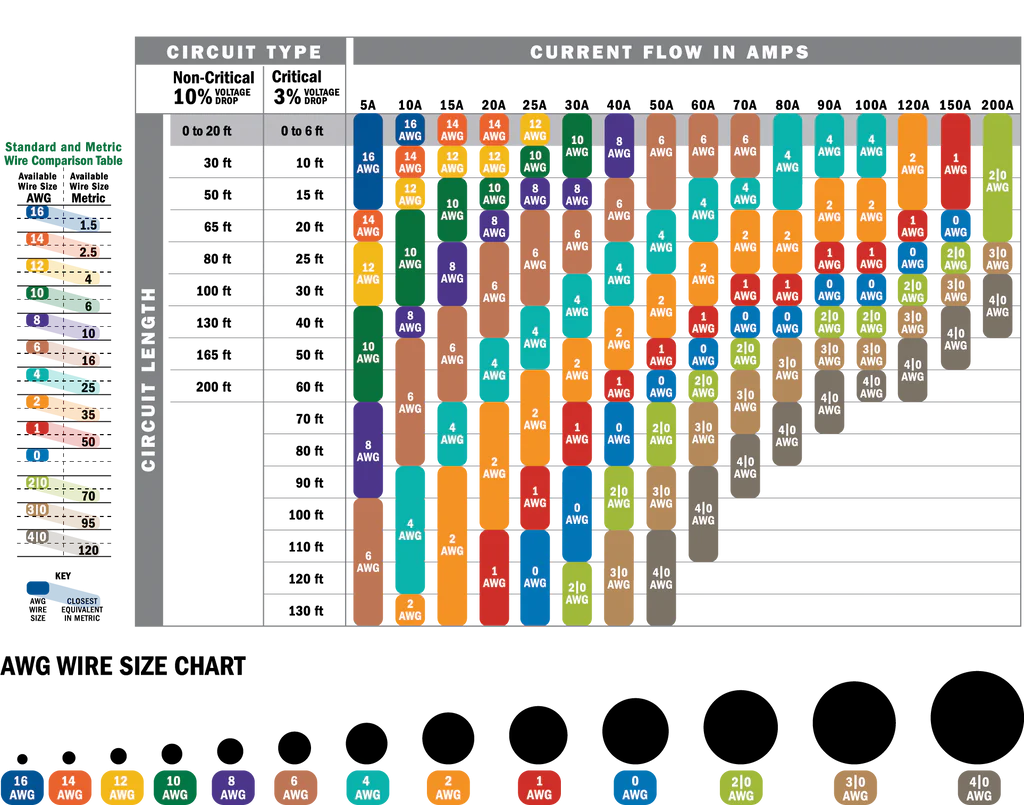
- Wires (check which gauge you need for each connection)
- MC4 connectors
How to Route Wires from the Roof Inside
Once your panels are mounted, you’ll need to route the wires from the roof to your battery and charge controller inside the RV. There are a couple of ways to do this.
Fridge Vent
One easy and non-invasive option is to use the fridge vent. Most RVs have a fridge vent, and it’s a great place to run your solar wires through without drilling new holes. It’s less risky because you’re using an existing access point. However, you might need to get creative with the routing to avoid sharp turns or bends that could damage the wires.
Drill a New Hole
If the fridge vent isn't an option or you want a more direct route, you can drill a new hole in your roof. Yes, it sounds scary, but with the right precautions, it’s manageable. You’ll want to use a hole saw that matches the diameter of your wires. Just make sure to choose a spot that’s easily accessible from both inside and outside your RV. After drilling, route the wires carefully to avoid sharp edges.
Waterproof Seal to Prevent Leaks
Once the wires are routed, it’s crucial to seal the hole properly to prevent leaks. Use a waterproof adhesive sealant around the hole to ensure it’s fully sealed. A couple of applications of silicone-based sealant usually does the trick. This is a step you don’t want to skip because even the tiniest leak can lead to major water damage.
Connect Panels: Series for Voltage, Parallel for Amps
When connecting your solar panels, whether you go for series or parallel wiring largely depends on your charge controller’s specifications. I remember a time when I had no choice but to wire everything in series because my charge controller’s amp limit was too low for a parallel setup. Make sure to check the amp limit and voltage specs of your hardware before making a decision.
Connecting in Series
In a series connection, the voltage of each panel is added together, while the amperage stays the same. This is ideal if your charge controller has a lower amp capacity but can handle higher voltages. It’s a great option if you’re running long wires since higher voltage reduces energy loss.
Connecting in Parallel
With a parallel connection, the amperage of each panel is added, while the voltage stays the same. This setup is ideal if your charge controller can handle high amperages. However, this method requires thicker cables, which can get expensive. Keep that in mind if you're planning a large system.
Combine Series and Parallel
Some setups require a combination of series and parallel wiring to balance both voltage and amperage. This can be a bit trickier to set up, but it’s worth it for larger systems where you need to optimize both voltage and amps. Be sure to map out your wiring plan ahead of time to avoid confusion.
Install the Battery Bank
When installing the battery bank, place it in a well-ventilated area because batteries generate heat. If you’re working with lead-acid batteries, ventilation is even more critical due to the risk of gas buildup. Consider adding a small fan to encourage airflow and prevent overheating, especially if you’ve got your batteries tucked away in a tight spot.
Installing the Charge Controller
Types of Charge Controllers
There are two main types of charge controllers: PWM and MPPT. PWM controllers are cheaper but less efficient. If you’re on a budget, you can go with a PWM, but just know that you’re leaving some solar power on the table. On the other hand, MPPT controllers are about twice as expensive, but they are about 20% more efficient, squeezing every drop of power from your solar panels.
Mount It in Plain Sight
You’ll want to mount the charge controller somewhere visible, like near your RV’s electrical panel. Being able to regularly check the screen is important for spotting any issues early on—trust me, it’s a lot easier to fix a small issue before it becomes a big problem.
Wiring the Charge Controller to the Battery Bank
When wiring the charge controller to the battery bank, I recommend using stranded wire because it holds better in the controller terminals compared to solid wire.
Always connect the battery bank first before connecting the solar panels. This is important because most charge controllers are designed to initialize with battery power first, avoiding any potential damage.
Be sure to use the correct wire gauge. You can calculate the wire gauge needed based on the amp rating of your charge controller. For example, if your controller has a 30-amp rating, 10 AWG wire is typically a safe choice. Using the wrong gauge can lead to overheating and power loss.

Lastly, double-check the polarity—positive to positive, negative to negative. Incorrect polarity can damage your system, so it's worth triple-checking before turning anything on!
Connecting the Inverter
Regular Inverter vs. Solar Generator
A regular inverter converts the DC power from your batteries into AC power for your RV’s outlets. In contrast, a solar generator is an all-in-one unit that includes batteries, an inverter, and sometimes even a charge controller. Solar generators are easier to set up but tend to be less customizable and more expensive.
Wiring the Inverter to the Batteries
Wiring the inverter is pretty straightforward, but make sure to use heavy-duty cables to handle the current. Double-check the wiring diagrams that come with your inverter, and follow the manufacturer’s instructions closely.
Safety Tips for Inverter Installation
When setting up the inverter, don't forget about safety. Always make sure to switch off the inverter before connecting it to the batteries. User insulated tools to prevent accidental short circuits, and have a fire extinguisher nearby—just in case.
Troubleshooting Common Issues
Low Power Output
If your system isn’t generating as much power as expected, your panels might be dirty, but that’s not the only cause. Check for shade, even partial shading can lower power output by as much as 90%. Make sure there isn't a tree branch or antenna casting a shadow over your panels.
Battery Not Charging
If solar output power, but the batteries are not charging it could be:
- Loose Wire Connections: Even if they looked secure during installation, wires can loosen over time or when you're connecting other things. Recheck all your wire connections, especially between the panels, charge controller, and battery.
- Faulty Charge Controller: Check the display for any error codes or abnormal readings.
You might need to test it with a multimeter or consult the manual for troubleshooting steps.
In some cases, a replacement might be necessary.
Inverter Shutting Down Under Load
If your inverter shuts down when powering appliances, it could happens because:
Load Is Too Big: If the appliances are drawing more power than the inverter can handle, it will shut down. Check the inverter's rating against your appliances load. You might have to turn off one appliance to make room for another.
Alternatively you could buy a more powerful inverter. For my personal RV rig I went with a 5kW inverter, so I wouldn't have to worry about turning on too many appliances.
Insufficient Battery Capacity: Some lithium batteries have internal protection which disconnects them to prevent deep discharge. Try charging the battery bank. If that doesn't work try disconnecting the batteries completely so their inner electronics reset.
Conclusion
DIY RV solar installation is a great way to gain energy independence while saving a significant amount of money. With the right tools, some planning, and attention to detail, you can power your RV anywhere without relying on professionals.
Still have questions? Contact Us!